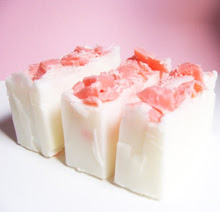
Everybody loves BATH BOMBS!!! They are so colorful and funny to make a simple bath become an amazing experience of relax,fun and aromatherapy!
You can find them in the stores in many colors,scents shapes...but what about creating them at home,with your favourite scents and colors??? Maybe adding some glitters or dryed flowers??
(I'm sure you're running to get the apron! )
Now I'll teach you a simple way to do them,the same recipe that I do for mines. =) Don't worry,it's easy and you don't need strange or dangerous ingredients
You'll need:
- a large bowl for the dry ingredients
- a small bowl for the wet ingredients
- a spray bottle for the water
- spheric moulds (for the classic round bath bombs,but you can use every other kind of mould)
Ingredients:
Baking Soda - 8 ounces
Citric Acid - 4 ounces
Corn Starch - 4 ounces
Water (put it in the spray bottle)
Essential or Fragrance Oil
Oil (olive oil or sweet almond oil will work - I use sweet almond)
Food coloring - 1 or 2 drops.
Instructions:
Mix in the large bowl all the dry ingredients. Mix very well.
Mix in the small bowl all the wet ingredients (except the water that must be poured into the spray bottle).
Now mix carefully but as fast as you can the wet ingredients into the dry ingredient's bowl. If you see that the powder starts fizzing, mix fast and this will stop the reaction.
Now you should have a soft colored and scented powder, not too dry and not too wet.
Spray water 3 or 4 times and mix mix mix very fast to avoid it fizzing.
Now you should have reached this consistence
Press the mixture in the moulds; if you're using the spheric moulds (that can be found as christmas decorations in many stores) press well the mixture in each half mould and then press well the 2 half moulds together.
If you want to add something on the top of the bomb (glitters,dry flowers,herbs,sprinkles..) put it in the bottom of the half mould before filling it with the mixture.
You don't need to leave them in the mold for very long, and in fact can tap them out as soon as you fill them.
Leave them drying for some hours.


1 comments:
I love that this recipe is easy to follow.
Post a Comment